Tagging
Tags are keywords or terms which are inputted during configuration to describe a piece of content. They are a great way to categorize your stimuli based on format, objective, content, brand, theme, or any attribute that you wish to test and compare.
In this article:
- What are the benefits of tagging?
- How to implement ad hoc tagging
- Choosing a taxonomy
- Implementing your taxonomy
What are the benefits of tagging?
1. Sort stimuli efficiently
Search by tag on your reporting dashboard. Cut the time spent searching and instantly gather past and present surveys with common themes.

2. Group stimuli into relevant categories
Enable your brand-specific teams to filter all stimuli by category when they apply tags, and quickly build a pool of data they can learn from over time. Especially useful for enterprises with many brands.
3. Create instant custom benchmarks
Compare across all relevant tests on your platform by creating an automatic benchmark for your specific tag. When using any chart, go to the norms tab on the right-hand side, select “User-defined norm” and the drop-down menu will give you all the tags for the stimuli you are comparing.
4. Unlock Advanced Analysis capabilities
Take tags to the next level with a Content Theme Analysis. Most effective with larger data sets, this process gives you actionable insights in an easily exported table.
How to implement ad hoc tagging
You are prompted to add tags when you upload your stimuli. Simply type the tags into the tagging field and press enter:

The best time to start tagging is now, and the best way is to introduce tags to all new stimuli.
Although tags are easy to create, the system needs some thought. Choosing a taxonomy (your tagging structure) is entirely dependent on your company’s brands, strategy, and KPIs.
Choosing a taxonomy
A taxonomy is taking tagging from ad hoc to scalable across your business and tests. With a taxonomy applied to your domain, users will add consistent tags that make theme analysis easier, quicker, and more valuable.
We recommend using a tiered structure to create an expandable and easy-to-follow system. Think brand, campaign, or message, and then specifics that can be nested together.
Until you get to the specific level keep it broad. It may be that you have to merge similar categories. For example, ‘Sporting Celebrity’ and ‘TV Celebrity’ may be better as ‘Celebrity’ in order to make a larger, more statistically significant category.
- Map out the objectives and business questions you would like to answer (i.e., does a celebrity presence in your TV ads increase likelihood to purchase over those that do not include a celebrity? Is the effect the same or different for your digital ads?)
- Using your objectives, plan your taxonomy structure. Copy this template to help you get started organizing your thoughts.
- Get feedback: Speak to your stakeholders internally and your customer success manager at Zappi. Is there anything else they'd like you to consider before implementing?
- If you are a power user or admin, implement your taxonomy on platform using the instructions in the next section.
- Start small: Your taxonomy can be updated and evolve over time. Starting small with your key business questions will help to shape something, and provide a foundation to build on and refine as your business grows and changes.
- Get started as soon as you can: Implementing even a basic taxonomy early on will help you avoid spending time retroactively tagging previous projects.
- Think about the essentials: Your taxonomy should focus on your key tags, as including too many will add to configuration time. Don’t forget, custom tags can always be added on an ad hoc basis for specific needs/projects.
For support with tagging, contact your Customer Success Manager who can give you further guidance.
Implementing your taxonomy
If you are a power user or admin for your domain, you can add the tagging taxonomy you created (see above) and set them as mandatory or optional. Doing this means all the users in your domain will choose from the same tags when configuring projects, and when set to mandatory, be required to select an option in order to proceed with launch. This way you ensure consistency of common tags and increase your speed toward meta-learnings.
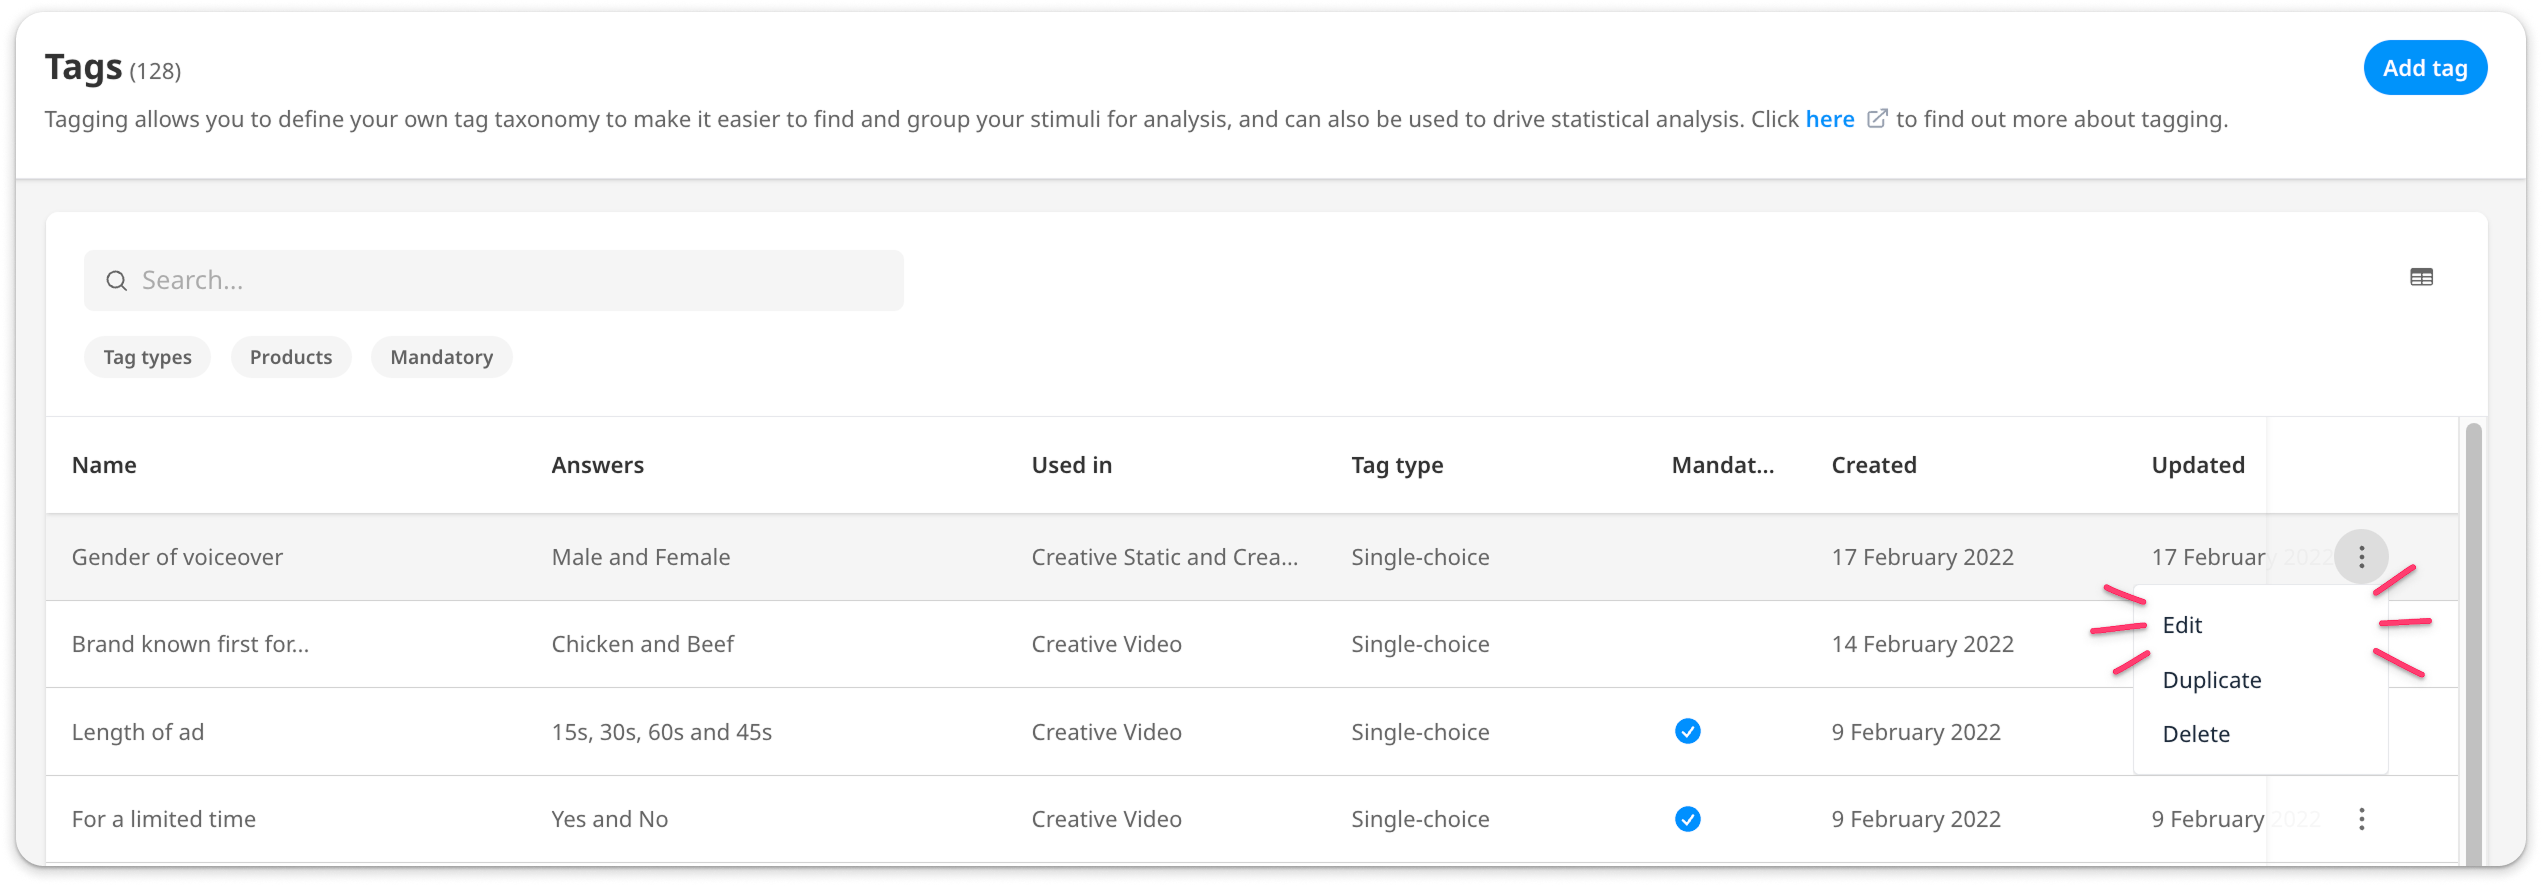
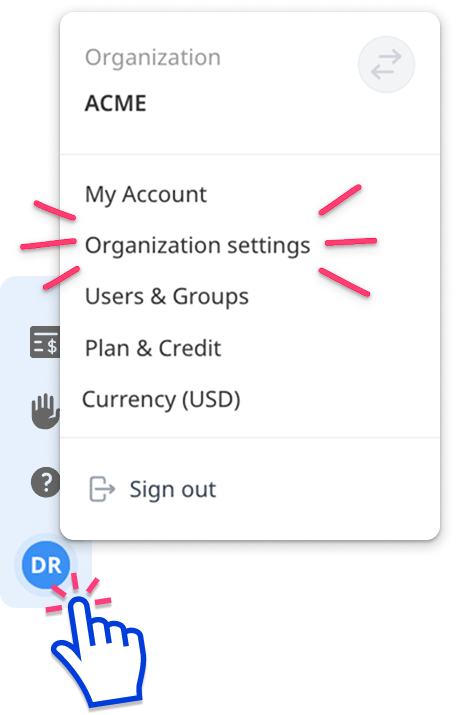
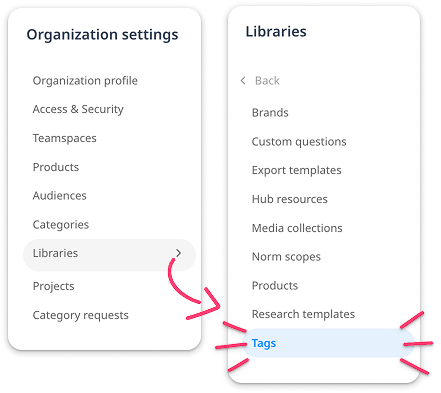
Go to Organization Settings > Libraries > Tags, and as a power user, you will see a summary of all tags across all the Zappi tools used in your domain (or it will be empty if none have been added).
|
|
|
Click the "Add tag" button and follow the prompts to name the tag, select its type, provide the tag options, and select which Zappi tools and teamspaces it should be available on.

When creating or editing a tag, you can also set whether a tag is mandatory or not.

During the configuration of a project, all the users for your subdomain will see ‘optional’ next to the tags that are not mandatory. Each stimulus will show ‘Add more info’ and a warning message will appear on the tag until all mandatory tags have been correctly filled.

This feature will not affect your analysis, as we cannot insist on tagging previously completed projects. However, it will affect the drafts in progress.
Learn more about what admins can do to set users up for success here.
Editing tags
- Research data is not permanently lost or altered from tag removal or edits.
- Changes are version-tracked, so edits can be audited.
- Changing a tag won't affect your data or analysis.
- Edits are applied globally.
From the tag library, select the 3-dot menu for the tag you want to edit. A warning appears to remind you that any edits made to this tag will apply globally, then you can adjust the tag in the same way you would create one.